Learn how to change a doorknob with these clear, step-by-step instructions covering necessary tools, removal, installation, and troubleshooting advice for a safe and fashionable home update.
Door knobs play a crucial role in our everyday lives, offering security and aesthetic appeal to our homes. We cannot overlook the significance of these fixtures, even though they may seem basic.
Over time, door knobs can become worn, damaged, or outdated, requiring a replacement.
Learning to change a doorknob is valuable if you want to spruce up your home or improve security. This guide will walk you through every step, from choosing the right door knob to installing it like a pro.
Tools and Materials Needed
Before you embark on your door knob replacement journey, gathering the tools and materials is essential. Here’s a list of items you’ll need for this project:
- Screwdriver (Phillips or flat-head, depending on your door knob screws)
- New doorknob set (including knobs, latch, and strike plate)
- Tape measure
- Chisel and hammer (if needed for adjusting the latch hole)
Once you’ve gathered your tools, it’s time to choose the right door knob for your needs. Keep in mind the style and finish of your existing door hardware and the overall aesthetic of your home. Consider the security features you require, such as keyed entry or privacy locks.
Preparing for the Task
Safety should always be a priority when working on home improvement projects. Before you start, ensure that any nearby power sources are disconnected to avoid accidents. Clear the area around the door, removing any decorations, obstacles, or rugs that may hinder your workspace.
Next, use your tape measure to record the dimensions of your existing door knob, latch, and strike plate. This information will be helpful when selecting a new door knob set and ensuring a proper fit during installation.
Guide on How to Change a DoorKnob
Step 1: Removing the Old Door Knob

Begin by carefully examining your current door knob to locate the screws holding it in place. These are typically found on the interior side of the door, either on the doorknob itself or the baseplate.
Use your screwdriver to remove the screws and gently pull the door knob apart, removing the interior and exterior pieces.
Next, remove the latch assembly by unscrewing any screws and securing it to the edge of the door. Once detached, pull the latch out of the door. If your door has a separate strike plate, remove it by unscrewing it from the door frame.
Step 2: Preparing the Door for the New DoorKnob

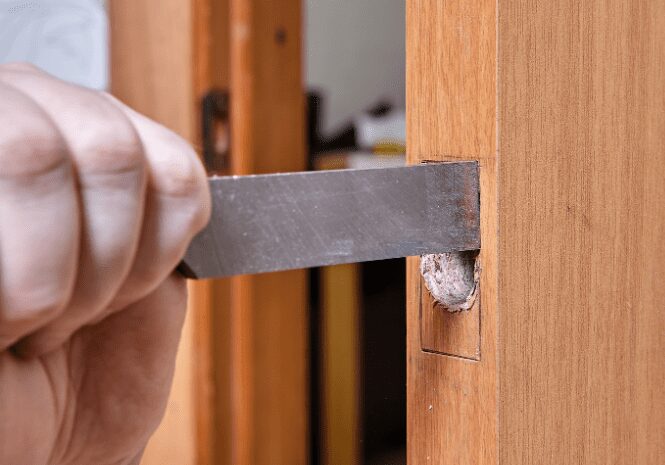
With the old door knob and latch removed, take a moment to inspect the existing latch hole in the door. Ensure that it is clean and free of debris. If your new latch is a different size or shape, you may need to enlarge or reshape the hole. Use your chisel and hammer to adjust the hole carefully as needed.
Step 3: Installing the New DoorKnob

Start by inserting the new latch assembly into the door, ensuring that the beveled edge of the latch bolt faces the door frame. Secure the latch in place with screws. If your new door knob set includes a strike plate, attach it to the door frame using the provided screws.
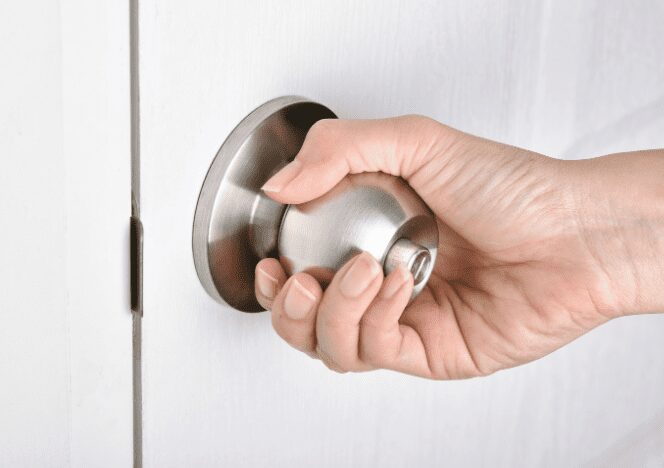
Next, align the exterior and interior door knob pieces with the latch mechanism, ensuring the spindle passes through the latch hole. Hold the door knobs and secure them together using the provided screws. Tighten the screws until you firmly attach the doorknob but it can still turn smoothly.
Step 4: Testing the New Door Knob

Before declaring the project complete, it’s essential to test the functionality of your new door knob. Turn the knob to ensure it rotates smoothly, and the latch retracts and extends appropriately.
Close and open the door several times, checking for any issues with alignment or operation. If the door does not close or open smoothly, make necessary adjustments to the latch, strike plate, or door knob screws until optimal performance is achieved.
Troubleshooting Common Issues
You may encounter common issues when changing a door knob despite your best efforts. Here are a few problems and their potential solutions:
Doorknob is not aligning correctly with the latch
If the doorknob does not align correctly with the latch, double-check the measurements and positioning of both components. You may need to adjust the latch hole or strike plate position to achieve proper alignment.
Doorknob is not turning smoothly.
If your door knob does not rotate smoothly, ensure the screws are not overly tightened, causing friction. Loosen the screws slightly and test the doorknob again. If the issue persists, verify that the spindle and latch are correctly aligned and functioning without obstruction.
The latch is not retracting fully.
Inspect the spindle and latch mechanism for any obstructions or misalignments if the doorknob does not retract fully when turned. Adjust the doorknob screws as needed to ensure proper operation.
Tips for Door Knob Maintenance
To prolong the lifespan of your new door knob and maintain its appearance, follow these simple maintenance tips:
Regular cleaning
Clean your door knob regularly using a gentle cleaning solution and a soft cloth to remove dirt, dust, and grime. Avoid abrasive cleaners or harsh chemicals that may damage the door knob’s finish.
Lubricating moving parts
Periodically lubricate the moving parts of your door knob, such as the spindle and latch mechanism, using a silicone-based lubricant. This will help ensure smooth operation and reduce wear and tear.
Inspecting for wear and tear
Regularly inspect your door knob for signs of wear, such as loose screws, damaged components, or tarnished finishes. Address any issues promptly to maintain the door knob’s functionality and appearance.
FAQ
How do you take out a doorknob and put it back in?
To remove a door knob, locate and unscrew the screws holding it in place. Then, pull apart the door knob and remove the latch assembly. To reinstall, follow the process in reverse: insert the latch, align the door knobs with the latch mechanism, and secure them with screws.
Is it difficult to replace a door knob?
Replacing a doorknob is a relatively simple DIY project that most homeowners can complete with essential tools and some patience.
How do you remove a door knob with hidden screws?
For door knobs with hidden screws, look for a small notch or hole on the side of the knob. Insert a flat-head screwdriver or paperclip into the hole and press the release mechanism while pulling the knob off.
How do you remove an existing door knob?
Locate the screws on the interior side of the door, remove them, and pull apart the door knob. Then, unscrew and remove the latch assembly from the door’s edge.
How do you install a door handle?
The process is similar to installing a door knob: insert and secure the latch, align the door handle components, and attach them with screws.
How do you reset a coded door lock?
Consult the manufacturer’s instructions for your lock model, as the reset process can vary.
What is the mechanism behind a safe door lock?
Safe door locks typically use locking bolts, a dial or keypad, and a relocking mechanism to provide security.
Where can I get replacement parts for my doorknob?
AVisit a local hardware store or shop online for replacement parts specific to your doorknob model.
Which is better: buying or DIYing the replacement parts?
Buying replacement parts is usually more convenient and ensures compatibility, but DIY solutions can be more cost-effective if you have the necessary skills and tools.
Should I replace the entire knob or just the broken part?
If the broken part can be replaced quickly and the rest of the doorknob is in good condition, replace only the damaged part. Otherwise, consider replacing the entire doorknob.
How do I replace my front doorknobs?
The first step in upgrading your interior doors is to gather the necessary tools and materials, including a new knob, latch plate, and deadbolt, from your local Home Depot or on Amazon.
Check Bestselling doorknobs on Amazon below
Equipped with a Phillips-head screwdriver, you can begin by removing the old latch and faceplate and carefully unscrewing the mounting screws from the door jamb.
Next, align the screw holes of your new strike plate and secure it to the door jamb, ensuring the backset matches your existing setup.
When installing the lever or knob, ensure the cylinder passes through the small slot in the latch and the locking mechanism functions smoothly.
Attach the faceplate by locating the tiny slot and fastening it with the provided mounting screws to finish the process.
Following these simple steps, you can replace your old hardware and enjoy the enhanced security and aesthetics of your new door knob and latch system.
Conclusion
Changing a doorknob is a relatively simple home improvement project that can significantly enhance your home’s security and aesthetic appeal. Following this complete step-by-step guide, you’ll be well-equipped to change a door knob like a pro.
Don’t forget to share your experiences and any questions you may have in the comments section below. We’re always here to help and provide guidance on all things home improvement. Happy door knob changing!
Last update on 2024-11-21 / Affiliate links / Images from Amazon Product Advertising API


