Did you know you can clone your favorite orchid with practically zero effort? Introducing the remarkable world of orchid keikis – adorable baby orchid plants that offer a simple way to expand your collection. Orchids are enchanting blooms with unique growth patterns. This article reveals everything you need to know about keikis and how to propagate them for a flourishing orchid collection.
How to Identify Orchid Keikis
Spotting a Keiki: What to Look For
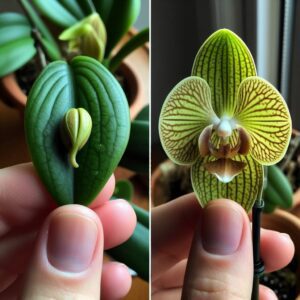
Keikis (pronounced “KAY-kees”) are miniature orchid plants forming on the mother plant. They typically appear on flower spikes (Phalaenopsis, Dendrobium) or at the base of the plant (basal keikis). At first, they might resemble new leaves, but you’ll notice tiny roots and a complete plant structure as they develop.

- How long does it take for an orchid keiki to grow? Keiki growth can be slow. It might take months for roots to form and even longer for it to be ready for separation.
How to Remove and Repot an Orchid Keiki

Keiki Separation and Repotting: A Step-by-Step Guide
-
When to Remove a Keiki: The ideal time to remove a Keiki is when it has developed three to four leaves and a healthy root system of at least 2-3 inches long. Removing it too early can jeopardize its survival.
-
Tools and Preparation: Gather sterilized pruning shears or a sharp knife, ground cinnamon (natural fungicide), a small pot, and a well-draining orchid potting mix.
-
The Removal Process: Carefully cut the keiki from the mother plant, cutting as close to the base of the keiki as possible. Dust both cut ends with cinnamon to prevent infection.
-
Repotting Your Keiki: Choose a small pot that provides snug support. Gently pot the keiki in the fresh orchid mix, covering the roots. Provide a stake for support if needed.
How to Care for an Orchid Keiki

Nurturing Your Young Orchid
-
Light Requirements: Young orchids thrive in bright, indirect sunlight. Avoid direct sun, which can scorch their delicate leaves.
-
Ideal Temperature and Humidity: Keikis prefer the same warm, humid conditions as their parent orchids. Maintain temperatures between 65-80°F (18-27°C) and humidity above 50%.
-
Watering and Fertilizing: Water your keiki sparingly, allowing the potting mix to dry out between waterings slightly. Use a diluted, balanced orchid fertilizer at quarter-strength every other watering.
-
Patience and Observation: Keikis grow slower than mature orchids. It may take several years before your keiki blooms, so be patient and enjoy observing its progress.
Common Keiki Problems and Solutions
Troubleshooting Keiki Challenges
-
Overwatering and Root Rot: Too much moisture is the most common problem. Look for yellowing leaves, mushy roots. Let the keiki dry out completely, repot with fresh mix if needed.
-
Pests and Infestations: Keikis can attract pests like scale, mealybugs, and fungus gnats. Use insecticidal soap or neem oil for organic control.
-
Failure to Bloom: Young keikis focus on vegetative growth. Ensure adequate light and fertilize only during the growing season to encourage future blooms.
Advanced Keiki Techniques
-
Keiki Paste – Encouraging Keiki Growth: Keiki paste contains plant hormones that stimulate keiki formation. Apply it sparingly to nodes on orchid flower spikes.
-
Basal Keikis: These keikis form at the base of the orchid. They can often be separated more easily with minimal cutting.
Orchid Keiki Quick Reference Guide

Conclusion
The Joy of Keiki Propagation
Propagating orchids from keikis is an advantageous experience. Not only does it allow you to expand your orchid collection cost-effectively, but it also offers a fascinating glimpse into the wonders of plant growth. Witnessing your tiny keiki mature into a beautiful, blooming orchid is truly special. Plus, you can share your keiki successes with fellow orchid enthusiasts!
Have you tried propagating orchids with keikis? If you haven’t yet, we encourage you to try it and discover the thrill of growing your orchid clones.
External Source
- American Orchid Society: https://www.aos.org/ – Highly reputable source for all things orchids.


