Can you start seeds indoors with limited space? Yes! This guide shows you how to start indoors with tomatoes, peppers, and marigolds. You’ll learn space-saving tricks, how to make your own seed-starting containers, and how to prevent common beginner errors.
Selecting Seeds for Your Space
When space is tight, choose wisely! Opt for high-quality, organic seeds, and consider the following:
- Compact Varieties: Look for tomato varieties labeled as “dwarf,” “bush,” or “patio.” Many peppers and marigolds also come in compact sizes.
- Your Growing Area: If you have a sunny windowsill but limited floor space, focus on smaller plants.
Space-Saving Seed Starting Supplies
- Upcycled Containers: Yogurt cups, eggshells, or newspaper folded into pots are eco-friendly and space-saving. Be sure to poke drainage holes! **
- Seed Starting Mix: Use a lightweight, well-draining mix. Find a pre-made mix or make your own with peat moss, vermiculite, and compost.
- Small-Space Lighting: If natural light is scarce, a tabletop grow light can provide the boost your seedlings need.
Creating the Perfect Seed Starting Environment
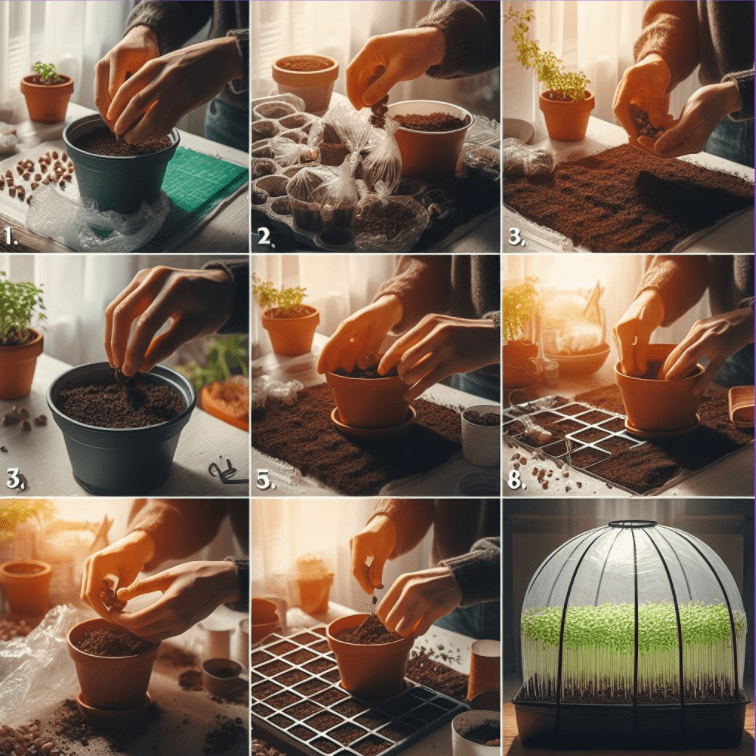
- Prep Your Space-Saving Setup: Fill your containers with the mix and lightly moisten them.
- Plant Your Seeds: Follow packet instructions for spacing. A quick tip: tomato seeds go about 1/4 inch deep, peppers slightly shallower, and marigold seeds can be lightly pressed into the surface.
- Gentle Watering: Use a spray bottle to avoid disturbing your seeds.
- Maintain Warmth: For faster germination, a heat mat can help keep the soil around 65-75°F.
- Humidity Boost: A clear plastic bag over your containers can create a mini-greenhouse effect if the air is dry. Remove it once sprouts appear.
Transplanting and Hardening Off
When seedlings have their first true leaves, it’s time for bigger quarters. Upcycle larger containers or purchase small pots. Before moving plants outdoors permanently, it’s important to “harden them off.” This means gradually getting them used to outdoor temperatures and sunlight over a week or so, which helps prevent shock.
Common Mistakes to Avoid with Tomatoes, Peppers, and Marigolds
- Overwatering: These plants like consistent moisture but hate soggy roots. Let the soil surface dry slightly between waterings.
- Not Enough Light: Leggy seedlings desperately need more light! Get them closer to a sunny window or use a grow light.
- Transplanting Too Early: Wait until your seedlings have a strong root system and several sets of true leaves.
Seed Starting Success in Small Spaces
Don’t let limited space hold your garden back! Here are some creative ideas:
-
Vertical Gardening
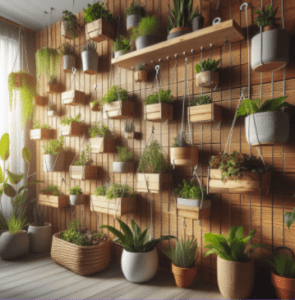
Vertical Gardening Tips for Beginners
- Start Small: Begin with a single wall-mounted planter or a few hanging baskets. This lets you get a feel for the process before expanding.
- Choose the Right Plants: For edible gardens, consider herbs, strawberries, leafy greens, or compact varieties of tomatoes and peppers. For flowers, trailing plants like petunias and nasturtiums create a beautiful cascade.
- Support is Key: Ensure your vertical structures are securely installed and capable of handling the weight of plants, soil, and water.
- Sunshine Matters: Place your vertical garden where it will receive adequate sunlight based on your chosen plants.
- Watering Wisely: Vertical gardens can dry out faster. Check the soil regularly and water deeply, especially at the top, so moisture reaches all roots.
- Get Creative!: Think beyond traditional planters. Upcycle old gutters, build a tiered structure from pallets or create a living wall with planting pockets.
Bonus Tip: Research plant spacing requirements for vertical setups. Often, you can plant slightly closer together in vertical gardens than in traditional ones.
-
Tiered Racks

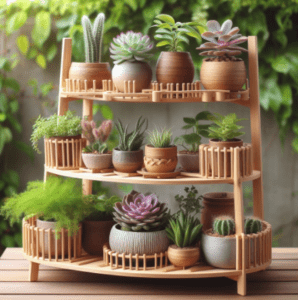
Small Tiered Plant Rack Tips
- Material Matters: Choose a material that suits your environment and style. Options include wood, metal, and durable plastic.
- Size Up Your Space: Measure the area where you plan to place the rack and ensure it’s a good fit, leaving room for plants to grow.
- Think Light: Consider how much sunlight the area receives and choose plants accordingly. Higher tiers typically get more light.
- Style & Function: Tiered racks come in various designs. Pick one that complements your décor and offers enough shelf space for your plants.
- Drainage Details: Ensure each tier has drainage holes or add trays to catch excess water.
- Weight Wise: Consider the overall weight of plants, soil, and water the rack will need to support.
- Maximize Your Space: Place taller plants on lower tiers and trailing or cascading plants on higher ones to create a visually appealing display.
-
Windowsill Herb Garden

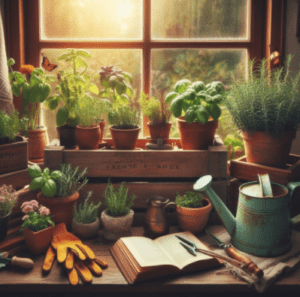
Windowsill Herb Garden Tips
- Sunny Location: Choose a windowsill that receives at least 6 hours of direct sunlight daily. South-facing windows are usually the best.
- The Right Herbs: Start with easy, versatile herbs like basil, chives, mint, parsley, and oregano.
- Container Considerations: Use pots with drainage holes. Size them according to the mature size of your herbs.
- Quality Soil: Use a well-draining potting mix specifically for herbs.
- Regular Watering: Check the soil daily. Water when the top inch feels dry, but avoid overwatering.
- Harvest Often: Frequent harvesting encourages bushy growth and prevents herbs from going to seed.
- Rotate for Even Light: Turn your pots regularly to ensure all sides of the plants get adequate sunlight.
- Group Smartly: Place herbs with similar watering needs together to simplify care.
Bonus Tip: If your windowsill is narrow, consider a hanging planter or a small vertical rack to maximize space.
Conclusion
With some planning and resourcefulness, Indoor Seed Starting is an exciting way to create a thriving garden– no matter how much space you have. Happy gardening!
Author Bio: Milan is an avid gardener and DIY home improvement expert with over 35 years of experience in gardening jobs and tool fixing and maintenance.


