From seed to broom, discover the fascinating world of broomcorn. Learn how to grow, harvest, and craft your broomcorn creations with our expert tips.
When autumn rolls around, I always get this itch to bring a touch of the season into my home. On one of these fall days, as I was sweeping my porch with an old-fashioned broom, I began to wonder about the history and origins of this simple household tool.
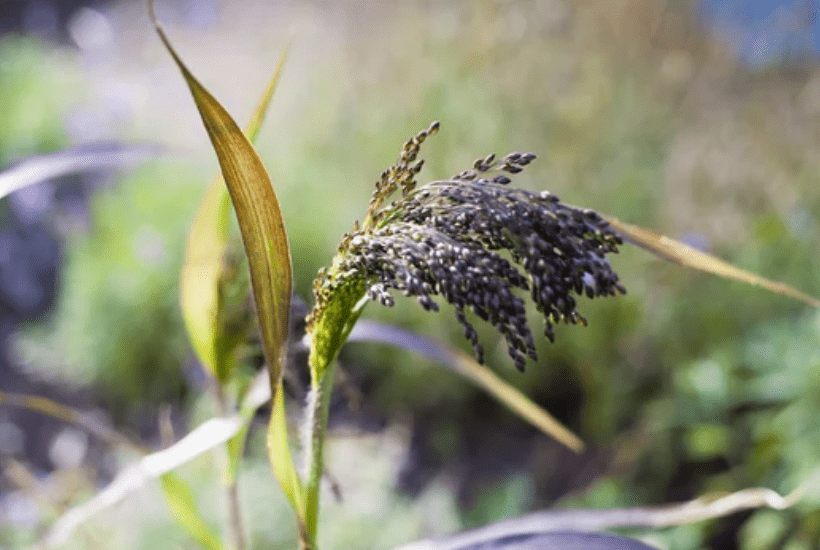
Lo and behold, I stumbled upon the fascinating world of broomcorn, a variety of sorghum (Sorghum vulgare var. technicum) used to make those tightly bound broom straws.
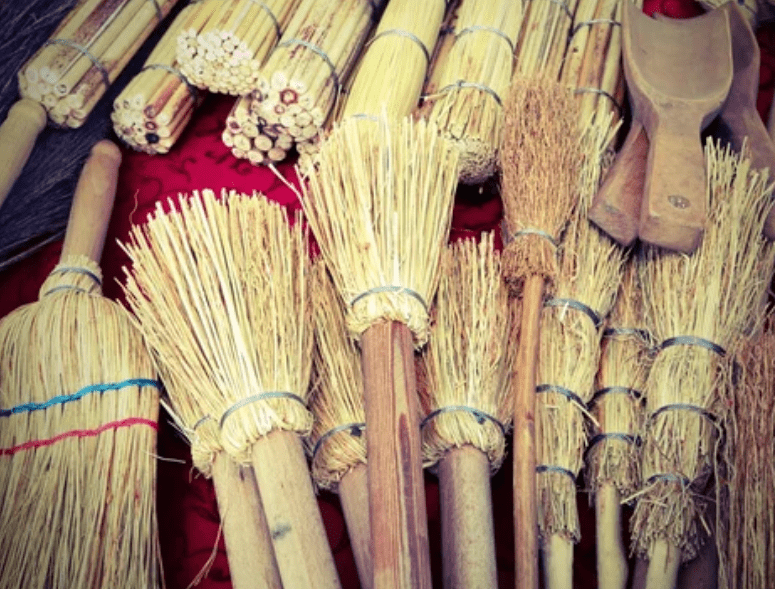
The beauty of broomcorn lies not only in its practical use but also in its versatility. In days gone by, people not only made their standard brooms with broomcorn but also smaller whiskbrooms for little chores here and there.
Although electronic gadgets and other fancy sweeping contraptions have taken over most of our cleaning needs today, there’s still something inherently satisfying about using a broom made from natural materials.
Broomcorn is a unique sorghum that doesn’t hold much value as livestock feed, unlike its other sorghum siblings. But don’t let that fool you – its seeds are as valuable as oats. And while the stalks might not be much to write home about, the long, fibrous straws are the real stars of the show.
They’re perfect for making brooms and whiskbrooms, beautiful baskets, and autumnal arrangements that add a rustic touch to any space.
I decided to take the plunge and try growing broomcorn in my backyard. After all, there’s something gratifying about using your hands to create something from scratch. Armed with a sunny spot in my garden and a handful of seeds, I set to work, following the simple steps of “plowing, disking, and double harrowing” the soil, just like the pros do.
With my plants spaced out just right, all that was left was to wait.
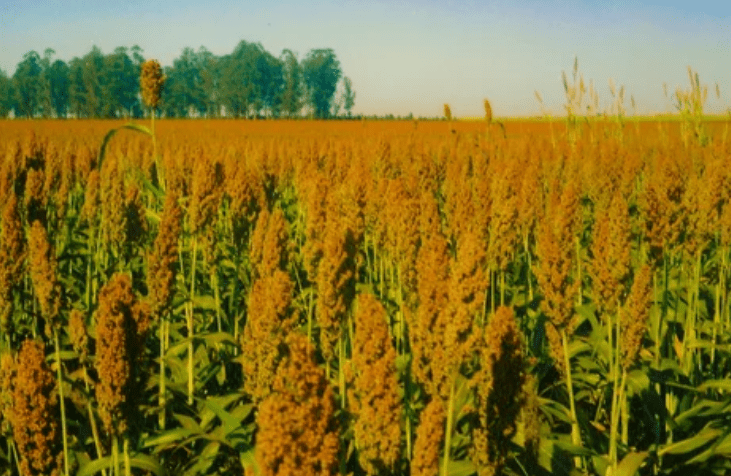
And let me tell you, broomcorn did not disappoint. With its resilience to heat and drought, my little crop thrived, turning my backyard into a mini field of gold. When harvest time rolled around, I felt like a kid in a candy store, my hands eagerly plucking the mature seedpods and laying them out to dry.
The dried broomcorn made for the perfect material for my DIY projects. I dabbled in everything from witches’ brooms (just in time for Halloween!), festive wreaths, and even a small basket or two. Each project was a testament to the incredible versatility of this humble plant.
So, if you ever find yourself with a bit of space and hankering for a DIY adventure, why not try broomcorn? You might find that this simple plant has more to offer than meets the eye, and that there’s nothing quite like the satisfaction of creating something beautiful with your own two hands.

How to Plant Broomcorn Seeds
Broomcorn seeds can be sown directly into the soil once the last frost date has passed. You can also start them indoors for about four weeks before transplanting them outside.
To sow the seeds outdoors, choose a sunny location with well-drained soil that has been amended with organic matter. Make shallow furrows about one inch (2.5 cm.) deep and six inches (15 cm.) apart. Drop the seeds about one inch (2.5 cm.) apart along the furrows and cover them lightly with soil. Water well and keep the soil moist until germination.
To start the seeds indoors, fill small pots or trays with seed-starting mix and moisten it well. Sow two or three seeds per pot or cell about one-fourth inch (0.6 cm.) deep and cover them lightly with soil. Place the pots or trays in a warm place with bright light and keep the soil moist but not soggy until germination.
When the seedlings have two or three true leaves, thin them out to one per pot or cell by cutting off the weaker ones at the soil level. Harden off the seedlings by gradually exposing them to outdoor conditions for about a week before transplanting them outside.
Transplant the seedlings to their final location when they are about six inches (15 cm.) tall and after all danger of frost has passed. Space them six inches (15 cm.) apart in rows at least 12 inches (30.5 cm.). Water well and mulch around the plants to conserve moisture and suppress weeds.
How to Care for Broomcorn Plants
Broomcorn plants are relatively easy to care for once they are established. They need regular watering during dry spells, especially when flowering and forming seeds. However, avoid overwatering or waterlogging them as this can cause root rot or fungal diseases.
Broomcorn plants also benefit from occasional fertilizing with a balanced fertilizer or compost tea during their growth period. Apply the fertilizer according to the label instructions and water well afterward.
Broomcorn plants may need some support as they grow taller and heavier. You can stake them individually or tie them together in groups with twine or wire. This will prevent them from bending or breaking due to wind or rain.
Broomcorn plants may also attract pests and diseases, such as aphids, spider mites, leafhoppers, corn borers, corn earworms, rust, smut, and leaf spot. You can control these problems by using organic methods, such as spraying with insecticidal soap, neem oil, or horticultural oil, removing infected or damaged parts, and practicing crop rotation and good sanitation.
How to Harvest and Dry Broomcorn
Broomcorn is ready to harvest when the seeds are fully formed, and the tassels are dry and brittle. This usually happens about 100 to 120 days after planting.
To harvest broomcorn, cut the stalks about six inches (15 cm.) below the seed heads with a sharp knife or scissors. Be careful not to damage the fibers as they are the main material for making brooms.
Remove the seeds from the seed heads by rubbing them gently with your hands or a coarse cloth. You can save some seeds for planting next year or use them as bird feed.
Bundle the seed heads with twine or wire and hang them upside down in a dry, airy place for about two weeks. This will allow the fibers to cure and become stiff and durable.
How to Use Broomcorn for Crafts
Broomcorn can make brooms, whiskbrooms, baskets, wreaths, arrangements, and other decorative items. You will need some tools and materials, such as scissors, wire cutters, pliers, glue guns, floral wire, floral tape, ribbon, twine, etc.
To make a broom, you will need about 60 seed heads of broomcorn. Cut off the stems about one inch (2.5 cm.) from the base of the seed heads. Divide the seed heads into four equal bunches and tie each bunch tightly with twine near the base.
Take a wooden dowel or a bamboo stick and wrap one end with floral tape. Insert this end into the center of one bunch of seed heads and secure it with glue. Repeat this process with the other three bunches of seed heads, arranging them around the dowel or stick in a symmetrical pattern.
Wrap floral tape around the base of the seed heads and the dowel or stick to cover the twine and glue. Trim any excess fibers or stems with scissors. Decorate your broom with ribbon, beads, flowers, or anything you like.
To make a whiskbroom, you will need about 15 seed heads of broomcorn. Cut off the stems about two inches (5 cm.) from the base of the seed heads. Tie them together tightly with twine near the base.
Take a piece of floral wire and wrap it around the base of the seed heads several times to reinforce it. Twist the ends of the wire together and cut off any excess wire with wire cutters.
Bend the wire into a loop or a hook for hanging your whiskbroom. Trim any excess fibers or stems with scissors. Decorate your whiskbroom with ribbon, beads, flowers, or anything you like.
To make a basket, you will need about 30 seed heads of broomcorn. Cut off the stems about four inches (10 cm.) from the base of the seed heads. Soak them in water for about an hour to make them more flexible.
Take a large bowl or a basket mold and turn it upside down on a flat surface. Arrange 15 seed heads around the bowl’s rim or mold in a radial pattern. Secure them with floral tape.
Weave the remaining 15 seed heads in and out of the first layer of seed heads in an over-and-under pattern. Secure them with floral tape.
Turn over the bowl or mold and remove it carefully. Trim any excess fibers or stems with scissors. Decorate your basket with ribbon, beads, flowers, or anything you like.
To make a wreath, you will need about 20 seed heads of broomcorn. Cut off the stems about two inches (5 cm.) from the base of the seed heads. Soak them in water for about an hour to make them more flexible.
Take a wire wreath frame and wrap it with floral tape. Attach one end of a piece of floral wire to the edge.
Take one seed head and bend it into a U-shape around the frame. Twist the floral wire around both ends of the seed head to secure it to the edge.
Repeat this process with the remaining seed heads, overlapping them slightly and covering the frame completely.
Cut off any excess floral wire and twist it into a loop or hook to hang your wreath. Trim any extra fibers or stems with scissors. Decorate your wreath with ribbon and beads.

Final Word
In conclusion, the journey from sowing the seeds to watching the golden sprays of broomcorn sway in the breeze to finally crafting those same sprays into various creations has been nothing short of magical. The world of broomcorn is steeped in history and practicality, but it’s also filled with endless possibilities for creativity and self-expression.
Each twist of the broom straw each placement in a basket or wreath, is a testament to the versatility and beauty of this humble plant. And, in a world that often feels dominated by the latest technology and gadgets, there’s something profoundly fulfilling about connecting with nature and our roots through the simple act of growing and creating with broomcorn.
So, to all the DIY enthusiasts and gardeners out there, give broomcorn a chance. You might find yourself swept away by its charm!


