Learn about the advantages of crawl space encapsulation, a low-cost method for controlling moisture, enhancing air quality in your home, and raising energy efficiency. Find out more about this critical home improvement right now.
A healthy and efficient home is essential for the well-being of its occupants. One often overlooked aspect of a home’s health is the crawl space. Crawl space encapsulation is a vital solution for various issues arising from unattended crawl spaces.
What is Crawl Space Encapsulation?
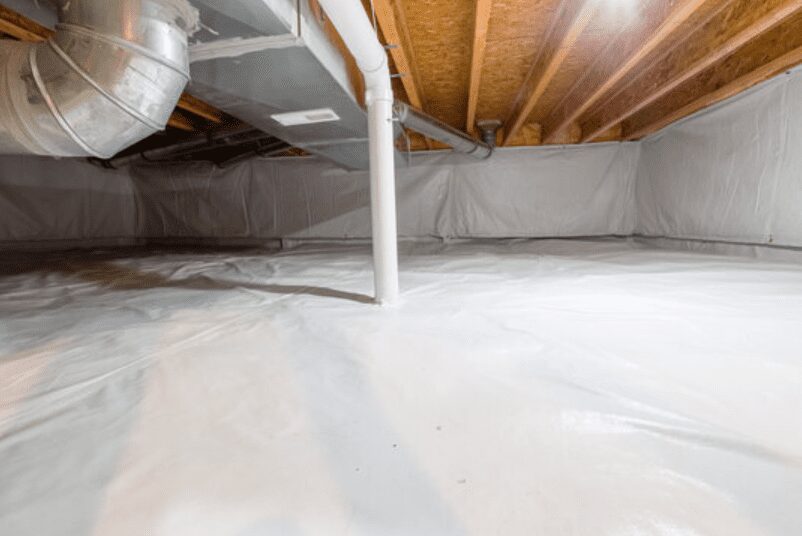
Crawl space encapsulation is sealing the crawl space from external elements by installing vapor barriers, insulating the walls and floors, and conditioning the air. This technique helps control moisture levels, prevent mold growth, and increase energy efficiency.
Unlike other crawl space solutions, such as ventilation or insulation, encapsulation provides a complete barrier against moisture intrusion and creates a controlled environment that prevents common issues caused by dampness and humidity.
The encapsulation process involves several steps, including inspecting the crawl space, installing vapor barriers, insulating walls and floors, sealing vents and openings, and installing a dehumidifier or conditioning system.
Reasons to Encapsulate Your Crawl Space
Moisture control: Excess moisture in your crawl space can lead to mold growth, wood rot, and pest infestations. Encapsulation helps prevent these issues by creating a moisture barrier and maintaining a dry environment.
Mold prevention: Encapsulation significantly reduces the likelihood of mold growth in your crawl space by controlling moisture levels and preventing dampness.
Pest control: A dry, sealed crawl space is less likely to attract pests, such as rodents and insects, reducing the risk of infestations.
Energy efficiency: Encapsulating your crawl space reduces air leakage and helps maintain consistent temperatures in your home, reducing energy costs.
Enhanced indoor air quality: A well-maintained crawl space prevents damp, musty air infiltration into your living spaces, promoting better indoor air quality.
Increased home value: An adequately encapsulated crawl space adds value to your property by improving its overall health and energy efficiency.

Signs You Need Crawl Space Encapsulation
Musty odors: If you notice a persistent, unpleasant smell in your home, it may be a sign that your crawl space requires encapsulation.
Mold growth: The presence of mold in your crawl space indicates excess moisture and the need for encapsulation.
High humidity levels: If your home feels damp and humid, encapsulating your crawl space can help regulate moisture levels.
Wet or damp insulation: Insulation that is wet or damp in your crawl space is a clear sign of moisture intrusion.
Pest infestations: A pest infestation may indicate an unsealed crawl space, making encapsulation necessary to prevent future issues.
Cold floors: Encapsulating your crawl space can help reduce drafts and cold floors in your home.
Materials Used in Crawl Space Encapsulation
Vapor barriers
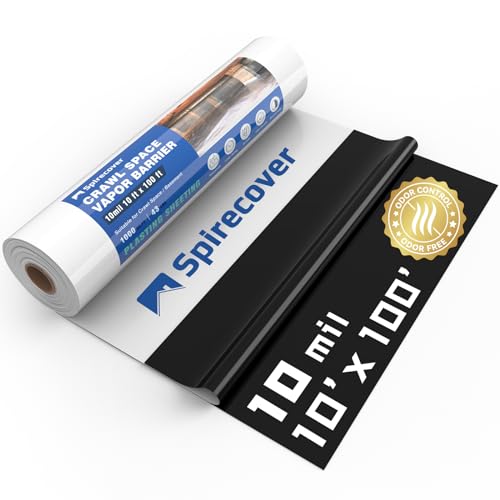
- Polyethylene sheeting: A common material used for vapor barriers, polyethylene sheeting is a durable and cost-effective option.
- Reinforced polyethylene: This material is more robust than standard polyethylene, providing increased durability and puncture resistance.
Insulation
- Rigid foam board: Rigid foam board insulation offers excellent thermal performance and moisture resistance.
- Spray foam insulation: Spray foam insulation provides an airtight seal and is ideal for insulating hard-to-reach areas.
Sealing materials
- Caulk: Caulk seals small gaps and cracks in your crawl space, ensuring a tight seal against moisture and air infiltration.
- Mastic: is a solid adhesive sealant commonly used to attach vapor barriers to walls and floors, ensuring a secure and durable bond.
The Encapsulation Process: Step-by-Step
Inspection and assessment: A thorough inspection of your crawl space is necessary to determine the extent of the issues and the most appropriate encapsulation strategy.
Cleaning and debris removal: Before encapsulation, it’s essential to clean the crawl space and remove any debris, such as old insulation, wood, and other materials.
Repairing and sealing foundation cracks: Foundation cracks, and gaps should be repaired and sealed to prevent water intrusion and air leakage.
Installing vapor barriers: Vapor barriers should be installed on the walls and floors of the crawl space, overlapping and sealing seams to create a continuous moisture barrier.
Insulating walls and floors: Insulation materials, such as rigid foam board or spray foam, should be installed on the crawl space walls and floors to improve thermal performance.
Sealing vents and openings: Vents and other openings in the crawl space should be sealed to prevent air and moisture infiltration.
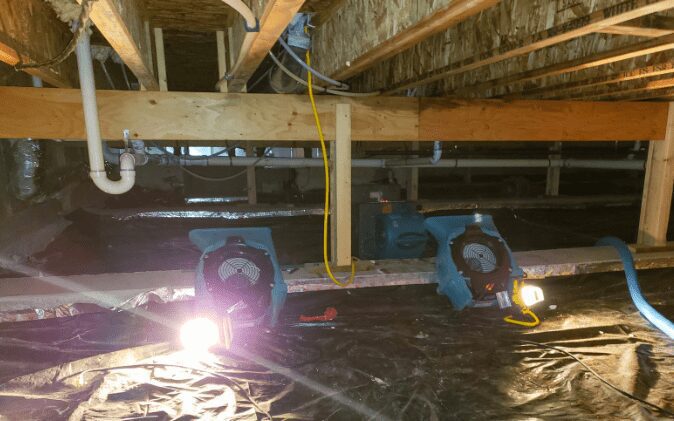
Installing a dehumidifier or conditioning system: A dehumidifier or conditioning system should be installed to regulate humidity levels and maintain a dry environment in the encapsulated crawl space.
Final inspection: A final inspection should be conducted to ensure that the encapsulation process has been completed correctly and effectively.
Costs and ROI of Crawl Space Encapsulation
Factors affecting costs: The cost of crawl space encapsulation can vary depending on the size of the crawl space, materials used, labor costs, and any necessary repairs.
Typical price range: Crawl space encapsulation costs typically range between $5,000 and $15,000, depending on the abovementioned factors.
Long-term savings and return on investment: Encapsulating your crawl space can result in significant energy savings and reduced maintenance costs, providing a return on investment within a few years.
Financing and payment options: Many contractors offer financing and payment options to make the encapsulation process more affordable for homeowners.
Step-by-Step Guide for DIY Crawl Space Encapsulation
Encapsulating your crawl space is an important home improvement project with numerous benefits. For homeowners who prefer a DIY approach, this step-by-step guide will walk you through encapsulating your crawl space.
Preparation
Assess your crawl space
Inspect your crawl space to determine the extent of moisture issues, the presence of mold or pests, and any necessary repairs before beginning the encapsulation process.
Gather materials and tools.
You will need the following items for encapsulation:
- A vapor barrier (e.g., polyethylene sheeting or reinforced polyethylene)
- Insulation (e.g., rigid foam board or spray foam)
- Caulk or mastic sealant
- Tape measure, utility knife, and scissors
- Protective gear (gloves, goggles, and a face mask)
- Dehumidifier or conditioning system (optional)
Clean and repair the crawl space
Remove debris, repair foundation cracks or gaps, and address mold or pest issues before encapsulating the space.
Encapsulation Process
Install vapor barriers on walls and floors
- Measure the crawl space walls and floors and cut the vapor barrier material to fit.
- Start by attaching the vapor barrier to the top of the walls using caulk or mastic sealant.
- Smooth the material down the walls, ensuring no gaps or wrinkles remain.
- Overlap the vapor barrier on the floor by at least 6 inches, and secure it in place with caulk or mastic.
- Seal any seams or joints with tape or additional sealant to create a continuous moisture barrier.
Insulate crawl space walls and floors
- Measure and cut the insulation material to fit the walls and floors of the crawl space.
- Install rigid foam board insulation on the walls by securing it with adhesive or mechanical fasteners.
- If using spray foam insulation, apply it according to the manufacturer’s instructions, ensuring even coverage and an airtight seal.
- Insulate the floors using the same method as the walls, ensuring no gaps or exposed areas exist.
Seal vents and openings
- Locate all vents, pipes, and other outlets in your crawl space.
- Use caulk or mastic sealant to seal any gaps around pipes and other penetrations.
- Close and seal crawl space vents using rigid foam board insulation, cut to fit the vent openings, and secured with adhesive or mechanical fasteners.
Install a dehumidifier or conditioning system (optional)
- Choose a dehumidifier or conditioning system appropriate for the size of your crawl space.
- Follow the manufacturer’s instructions for installation, ensuring proper placement and venting.
Post-Encapsulation Maintenance
Regularly inspect your encapsulated crawl space to ensure the vapor barriers and insulation are intact and there are no signs of moisture intrusion or damage.
Clean your crawl space as needed, removing any debris and ensuring proper air circulation.
Monitor humidity levels in your crawl space to ensure the encapsulation system works effectively.
Maintain your dehumidifier or conditioning system according to the manufacturer’s recommendations to ensure optimal performance and prolong its lifespan.
Following this step-by-step guide, you can successfully encapsulate your crawl space and enjoy the benefits of a healthier, more energy-efficient home.
However, if you encounter any issues or require professional assistance, don’t hesitate to consult with a qualified crawl space encapsulation contractor.
A well-encapsulated crawl space can lead to long-term savings, increased home value, and a more comfortable living environment for you and your family.
Remember that regular maintenance and inspection are crucial to ensuring the effectiveness and longevity of your DIY crawl space encapsulation project.
DIY vs. Professional Encapsulation
Pros and cons of DIY encapsulation: While DIY encapsulation may save money upfront, it can be time-consuming and may not provide the same level of protection as a professional installation.
The importance of hiring a professional: Professional encapsulation ensures that the job is done correctly, providing lasting protection against moisture, mold, and pests.
Choosing a reputable contractor: Look for contractors with experience in crawl space encapsulation, positive reviews, and proper licensing and insurance.
Maintaining Your Encapsulated Crawl Space
Regular inspections: Regularly inspect your encapsulated crawl space to ensure that the vapor barriers and insulation are intact and that there are no signs of moisture intrusion.
Cleaning and debris removal: Keep your crawl space clean by removing any debris and ensuring proper ventilation.
Monitoring humidity levels: Regularly monitor humidity levels in your crawl space to ensure the encapsulation system works effectively.
Servicing your dehumidifier or conditioning system: Regular maintenance of your dehumidifier or conditioning system will ensure optimal performance and prolong its lifespan.
FAQ
Why not to encapsulate the crawl space?
While crawl space encapsulation offers numerous benefits, some homeowners may have concerns about the initial cost or potential issues with improper installation. However, the long-term benefits of encapsulation, such as improved air quality, energy efficiency, and mold prevention, generally outweigh the drawbacks.
What is the best material for crawl space encapsulation?
Reinforced polyethylene is considered one of the best materials for crawl space encapsulation due to its durability, puncture resistance, and effectiveness in blocking moisture.
What materials are needed to encapsulate a crawl space?
You will need a vapor barrier (e.g., polyethylene sheeting), insulation (e.g., rigid foam board or spray foam), caulk or mastic sealant, and possibly a dehumidifier or conditioning system.
Can you encapsulate the crawl space DIY?
You can encapsulate your crawl space by following the step-by-step guide described above and gathering the necessary materials and tools. However, if you encounter any issues or require professional assistance, consult with a qualified crawl space encapsulation contractor.
How do you dry out a homemade crawl space?
To dry out a crawl space, you can use a combination of ventilation, dehumidifiers, and crawl space encapsulation to control moisture levels and prevent dampness.
What can I use to enclose my crawl space?
You can enclose your crawl space by installing vapor barriers, insulation, and sealing vents and openings. This process is known as crawl space encapsulation.
What material is used for encapsulation in crawl space?
Vapor barrier materials, such as polyethylene sheeting or reinforced polyethylene, are commonly used for crawl space encapsulation.
What is the best sealant for crawl space encapsulation?
Mastic sealant is a strong adhesive that is commonly used for crawl space encapsulation, providing a secure and durable bond for vapor barriers.
How thick should plastic be for crawl space encapsulation?
A 12 to 20-mil thickness is generally recommended for plastic vapor barriers in crawl space encapsulation to ensure durability and puncture resistance.
What are the negatives of crawl space encapsulation?
The primary drawbacks of crawl space encapsulation are the initial cost and the potential for improper installation. However, the long-term benefits, such as improved energy efficiency and moisture control, typically outweigh these concerns.
Can you waterproof a crawl space yourself?
You can waterproof your crawl space by encapsulating it with a vapor barrier and sealing vents and openings. This can be done as a DIY project or with the help of a professional contractor.
Why put pea gravel in the crawl space?
Pea gravel is sometimes used in crawl spaces to create a level surface, improve drainage, and prevent standing water. However, it is not a substitute for proper encapsulation and moisture control.
How deep should a crawl space be under a house?
Crawl spaces should have a minimum height of 18 to 24 inches for proper access, ventilation, and maintenance.
Will a crawl space dry out on its own?
A crawl space may dry out independently if it is adequately ventilated and moisture intrusion is minimal. However, encapsulation is the most effective method for controlling moisture levels in a crawl space.
The Final Word
Is Crawl Space Encapsulation Worth It?
Weighing the Costs and Benefits
When considering crawl space encapsulation, homeowners often question the overall cost and whether it’s worth the investment. While the initial cost may vary depending on factors such as crawl space size, materials, and labor, the long-term benefits can far outweigh the expenses. Encapsulated crawl spaces help reduce energy consumption, lower heating and cooling costs, and improve indoor air quality by preventing mold and mildew growth.
Preserving Your Home’s Structural Integrity
Encapsulation helps protect your home’s foundation and floor joists from moisture damage and potential structural issues. By sealing your crawl space completely, you prevent water infiltration and moisture-related problems that could compromise the structural integrity of your home. Investing in crawl space encapsulation protects your home and helps maintain its value over time.
Protecting Your Health and Comfort
A well-encapsulated crawl space can significantly reduce the presence of mold spores, allergens, and other contaminants in your living space. This leads to improved air quality and a healthier environment for you and your loved ones. Moreover, encapsulation helps maintain a comfortable indoor temperature throughout the year by controlling humidity levels and preventing drafts.
DIY vs. Professional Crawl Space Encapsulation
While some homeowners may choose to encapsulate their crawl space themselves, it’s essential to weigh the benefits of hiring a professional crawl space encapsulation company. Professionals have the expertise and equipment to properly install vapor barriers, insulation, and drainage systems, ensuring optimal performance and longevity.
Factors to Consider Before Encapsulation
Before proceeding with crawl space encapsulation, it’s crucial to address any existing issues such as standing water, mold remediation, foundation repair, or sump pump installation. By tackling these problems beforehand, you can ensure the encapsulation process is as effective as possible.
In conclusion, crawl space encapsulation is a worthwhile investment that offers numerous benefits for homeowners, from improved energy efficiency to enhanced indoor air quality and protection against structural damage.
While the initial cost may be a factor, the long-term savings and peace of mind make encapsulation a smart choice for many homeowners.
Don’t hesitate to consult with a professional crawl space encapsulation contractor to determine the best course of action for your home and enjoy a healthier, more comfortable living environment.
Last update on 2024-07-26 / Affiliate links / Images from Amazon Product Advertising API


