Make Your Best Storage Bench Of 2022
When you’ve run out of space, an easy-to-make piece of furniture known as a storage bench can hide a multitude of sins.
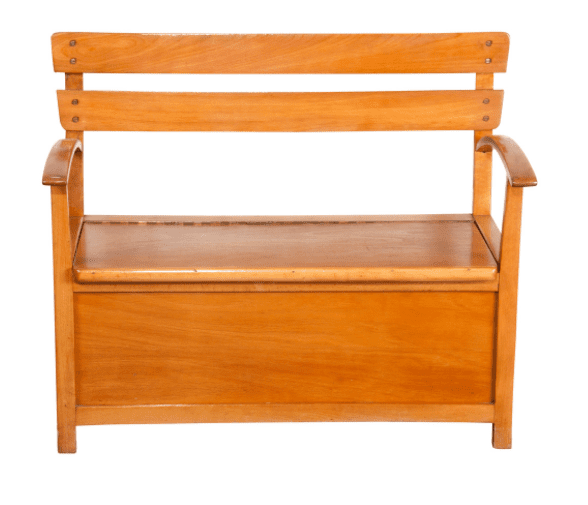
DO YOU have more stuff than space at your place? I’m always on the lookout for new and clever ways to help fight the war against clutter. And I’ve managed to come up with an easy DIY project that’s not only an intelligent storage solution; it also happens to be a handy piece of furniture.
This storage bench is ideal for hiding just about anything, from linen to kids’ toys. The design is straightforward. It consists of a box made from 16mm medium density fibreboard (MDF) to which you attach legs, armrests, and a backrest, all made from pine.
Storage Bench Required Materials:
16mm medium-density fibreboard (MDF)
2 800 x 284mm for the front and back of the box;
1 768 x 368mm for the bottom of the box;
1 800 x 410mm for the top of the box;
2 368 x 284mm for the sides of the box;
2 150 x 100mm for small decorative panels in the backrest;
70 x 35mm pine
2 585mm for the front legs;
2 830mm for the back legs;
2 400mm for the armrests;
2 760mm for the backrest.
Also, you will need wood glue, chipboard screws, 8mm timber dowel pegs, and a 500mm piano hinge.
Best Outdoor Storage Bench Of 2022 – How It’s Done
Step 1: First up, put the box together by butt-joining all the pieces except the top. Glue and screw the side panels between the front and back, then slip the compartment’s bottom into position and do the same.
Step 2: Before you attach the top of the box, you have to cut out a section for the lid. This gets hinged back on later. Mark out the area first – measure 150mm in from each side and 100mm from the back. You can use a circular saw to make the bulk of the cuts, but you’ll need a jigsaw to get into the corners.
Step 3: For some added strength, fix a length of MDF (approx 50mm wide) to the underside of the back cut on the remaining top piece. Let at least half of the piece extend into the cut-out area because the lid will cover this. Then glue and screw the top of the box into place. It should have an overhang of 10mm at the front. Next, attach the lid with the piano hinge.
Step 4: Now, it’s time to make the backrest. To add some interest, pop in a couple of decorative MDF pieces between the two rails and fix them in place using dowel joins. To do this, drill two 8mm holes in the top and two in the bottom of each MDF piece.
Put in some dowel markers so that you can pinpoint the position of the matching holes on the rails and drill them as well, making sure they’re centered within the 35mm edge. The top outside corners of the MDF pieces should be 150mm from either end of the rail.
Finally, when your drilling’s complete, join everything together with the dowel and don’t forget to put a smidgeon of glue in the holes first.
Step 5: While the backrest’s tightly clamped and you’re waiting for the glue to set, move on to making the legs. Each one needs to have a section cut out so they will all fit snugly around the box. To do this, make a mark at 150mm and then again at 450mm up from the bottom of each one. Then measure 20mm in from the edge and cut out the section with a jigsaw.
Step 6: Attach the backrest to the rear legs, again using dowel joins. It should be fixed 5mm down from the top of the legs, and remember, the cut-out sections of the legs should be facing each other.
Step 7: Now, it’s time to put everything together. Lay the rear legs (which are now attached to the backrest) down on the bench and slide the back of the box into the cut-out sections.
Then screw them together from the inside of the box. Next, do the same for the front legs. Finally, use dowel joins again to fit the armrests.

The only thing left to do is give it a slap of paint! Anyway, I’ll have some more handy storage solutions for you in the future, so stay in touch.
If You do not have spare time or being lazy, you can always buy storage benches on Amazon


