Gladiolas
Tall and graceful, the gladiolas have been adding beauty, color, and form to American gardens for more than 175 years.
The gladiolas were introduced to horticulturists of African origin during the early 1800s by trading ships that brought the corms from Capetown. They visited on their way around the Cape of Good Hope.
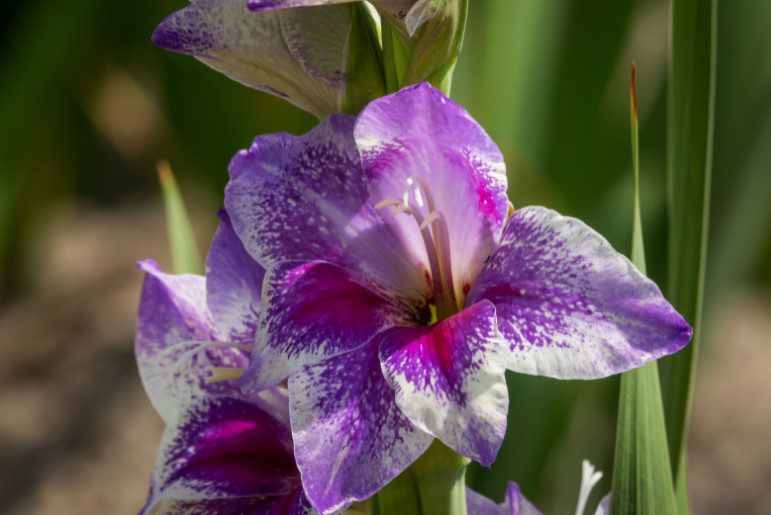
Today, through careful breeding and hybridization, gladioluses are available to the gardener in an almost unlimited range of colors. In fact, there is no color that the gladiolus cannot supply except true blue.
In addition to the amazing assortment of colors available, gladiolas exhibit a wide variety of floret shapes. Many of the early-day varieties carried only “plain” petals.
While the plain-petaled varieties can still be found, most of the newer, modern gladioluses come with heavy petal ruffling and fancy frills. Petals can also be laciniated, deeply cut, rolled, needlepoint, or crinkled.
The gladiolas are as easy to grow as it is beautiful. Of course, disease or insect pests may cause problems. But under normal growing conditions, the gladiolus calls for less care than most other garden flowers.
Best Time To Plant Gladiolas
Late February is the ideal time to plant the gladiolas in the Austin area. Local nurseries and garden centers usually feature a good supply of bulbs of desirable varieties. You should be able to find several dozen different varieties available locally.
Most mail-order seed and nursery catalogs also offer a generous selection of gladiolus varieties, including some recent All-American selections.
Whether you plan to buy your bulbs locally or through one of the mail-order catalogs, choose the varieties and colors that appeal to you. Color will probably be the key to your individual variety selections.
While the tall-growing, large-flowered type gladiolas are extremely popular, don’t overlook the miniature or “tiny tot” glads.
The little ones are often more ideally suited to today’s smaller homes and smaller gardens and are equal in every respect to their larger counterparts.
No matter which varieties appeal to you, look for quality bulbs when making your selections. Large, plump, firm bulbs are a wise investment. Low-cost “bargain” bulbs too often turn out to be no bargain at all.
Most gladiolas bulbs sold in the retail nursery trade will be large or jumbo in size. While large bulbs are not necessary for quality flowers, they generally produce the most satisfactory flower spikes.
Gladiolas Planting Secrets
There are few secrets to successful gladiolas culture. Just give them full sun, plenty of water, well-drained soil, and leave the rest to Mother Nature. She will take care that you are amply rewarded for your efforts.
If any practice needs to be emphasized, however, it would be the depth of planting. Be certain to plant large bulbs at least five or six inches deep in clay soils and even deeper in sandy areas.
Deep planting will give the plants the support they need to prevent wind damage and hold the heavy flower stem erect.
Go easy on commercial fertilizers. Watering is more helpful in producing beautiful flower spikes than is applying fertilizer.
However, before planting, a light application of a complete fertilizer high in phosphorus (such as 10-20-10) may be in order. Excessive use of fertilizer can lead to diseased foliage and bulbs.
Gladiolus will flower in 60 to 100 days from planting, depending on the variety. When they flower, more than likely, you will agree that their beauty and stature make them deserving of a prominent place in your garden.
First Time Growing Gladiolas
If this is the first time you’ve grown gladiolas, you now have a choice. Either dig up the bulb-like corms they grow from to keep them from dying in the cold winter or leave them in to freeze and add humus to your garden soil.
Glads are half-hardy perennials in our area – meaning they must be dug and stored indoors before the ground freezes solid.
Glads are among the showiest, most colorful, versatile, and easy-to-grow flowering plants. They are also relatively inexpensive, and for that reason, they may be left in to freeze and new corms purchased next spring.
For the keen or thrifty gardener digging and storing is the easiest way to propagate them in the constantly moist growing season that is just ending.
I suspect many of last year’s corms will have produced two large new corms for planting next season, as well as numerous tiny cormlets, which, if transplanted, should come into full blooming size in two years on average.
The corm you planted last spring shrivels to a thin, wrinkled disc during the growing season, and a new corm or two forms on top of the old corm at the base of this past season’s foliage and stem.
I have found it best to allow the plant tops to keep growing until the frost kills the tops and the new corms are as large as possible.
Before the ground freezes over during October, the corms should be dug up using a fork rather than a spade. That way, there is less chance of cutting into any of the corms.
All damaged corms should be immediately discarded. They are disease and pest-prone, and keeping them could easily lead to problems with the whole crop.
Next, knock off any loose soil and place the corms on newspapers or in trays by colors. Label them before you forget.
Cut off the foliage near the top of the corm, leaving a short handle. This is best done in the sun so they can dry outdoors for a day, then move them inside to a hot, well-ventilated place – if possible with temperatures up to 800 F (240 C) for about 10 days.
When the old spent corm will separate easily from the new one, pry them gently apart and discard the old one in about two weeks. Please don’t leave this job till later, when they will firmly fuse and be very difficult to separate.
Remove one or two of the papery sheathing husks and shake the new corms in a paper bag with some dusting sulfur, a naturally occurring fungicide that also discourages thrips.
Gladiolas Pests
Thrips are small blackish insects about one-sixteenth of an inch long. They cause harm by sucking the juices from the corm in storage and while it is growing.
Fortunately, most glad varieties are not affected by viral diseases. Begin with healthy corms, immediately discard any diseased plants and make certain corms are planted in well-drained locations.
After sulfur dusting, lay them out for another week in a hot indoor location, then store them for winter in single layers on trays or in old mesh onion bags or nylon pantyhose hung from the ceiling.
Gladiolas Storage
The best winter storage temperature range for glad corms is between 40 and 50 F (5 to 10 C). Warmer than this, and they will begin to sprout too early.
I find it is important to inspect them regularly – about once a month or at least two or three times before next spring – and to discard any less than perfect corms before any rotten ones affect the others.
Finally, as spring approaches, I spread them out on their bases with the bud side if early shoot growth occurs.
Next spring starts planting them about the first week in May at 10-day intervals for about three or four plantings to spread out their late summer to early fall natural blooming period.
Glads have three easy to satisfy basic requirements. They need to be planted in full sun, in soil with good drainage and must be kept away from the competing roots of any large shrubs or trees.
They thrive on regular waterings but disdain being in waterlogged soil. If your garden soil is clay, try planting the corms in the center of sharp sand about softball size (about three to four inches, or eight to 10 cm in diameter).
Not only do they dislike wet feet, but they also don’t like sodden soil around them and will soon rot in poorly drained soil.
Gladiolas Fertilization
Most authorities agree they only need moderate fertilization. They will probably benefit most from a high phosphorous formula such as 10-30-10, or 3-8-6, or some other formula of a similar ratio forked into the planting area a week or two before planting.
Glads are so popular and easy to grow that you will find them for late winter, early spring sales in chain stores as well as garden centers, nursery catalogs, and from specialty suppliers.
They can be planted in rows for cut flowers or in bold groups of all the same color; at least 12 in a group is the most effective.
In rows, they should be spaced about six inches (15 cm) apart; otherwise, about nine inches 22.5 cm) apart in display groups.
Large corms are best planted about six inches deep, and the small cormlets only half as deep. They will generally increase to full size after two years of growth.
There are now many thousands of named varieties, each with different colors or a mix of colors. A true blue is about the only color missing in their broad range of colors going from pure white, through greens on to deep black-reds.
The individual flowers can be up to 25 on a large healthy stem and come in different shapes with petals that are also wavy, ruffled, twisted, or plain.
Some petals have a texture like velvet, some suede, and some are silky smooth.
Finally, Canadians ought to be proud of the fact that in 1932 Professor E.F. Palmer of Vineland Ontario brought fame to Canada by introducing “Picardy.”
It was the first variety with huge flowers. Earlier, his pioneering hybridizing work did much to produce evenly spaced flowers up the stem, a new and welcome feature after nearly 2,000 years of worldwide gladiolus growing and flowering.
If You find this article interesting, please share it with your friends. Thank you.


