














If you want to grow something genuinely unique and educational in your vegetable garden, try growing peanuts! Despite their name, peanuts are not nuts at all; they are legumes (related to peas and beans). Even more surprisingly, they don’t grow on trees—they grow entirely underground.
While they are historically a Southern commercial crop, home gardeners in a variety of climates can successfully grow their own peanuts with a long enough summer. From the fascinating way they flower to the rewarding harvest, growing peanuts is an incredible experience. Here is everything you need to know to grow them from seed to snack.
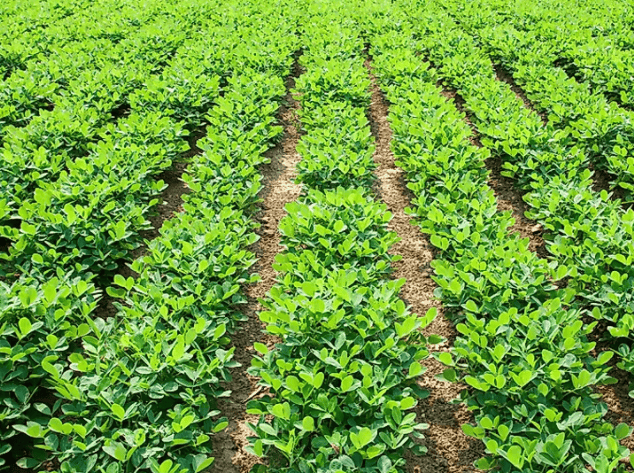
Preparing the Soil for Peanuts
Because peanuts form underground, the type of soil you have is the single most critical factor for success. They require loose, well-draining, sandy loam soil. If you have heavy clay, the peanuts will rot before they mature, or you simply won’t be able to pull them out of the ground.
- pH Level: Aim for a soil pH of 5.8 to 6.2.
- Fertilizer: Because peanuts are legumes, they fix their own nitrogen from the atmosphere. Do not apply high-nitrogen fertilizers (like lawn fertilizer), or you will get massive leafy green plants and zero peanuts. If a soil test indicates a need for fertilizer, use a 0-10-20 or 5-10-10 blend before planting.
Planting the Seeds
To grow peanuts, you literally plant raw peanuts! You can buy specialized seed peanuts from nurseries, or use raw, unroasted, unsalted peanuts from a grocery store (make sure the thin red skin is still intact).
Peanuts are incredibly frost-sensitive. Wait to plant until all danger of frost has passed and the soil has thoroughly warmed up to at least 65°F (usually early June in most temperate regions). Plant the seeds 1 to 2 inches deep, spaced about 4 to 6 inches apart, in rows that are 30 to 36 inches apart.
The Fascinating “Pegging” Process
About 30 to 40 days after the plants emerge, something magical happens. The plant will produce small, yellow, sweet-pea-like flowers near the lower stems. Once a flower is pollinated, the petals fall off, and the stem (called a “peg”) begins to elongate and bend downward.
The peg literally buries itself 1 to 2 inches into the soil. Only once it is safely underground does the tip of the peg swell and form the actual peanut pod! Because of this process, you must keep the soil around the base of the plant loose and weed-free so the pegs can easily penetrate the earth.
Watering and Calcium Needs
Peanuts have a deep taproot, making them surprisingly drought-resistant once established. However, they need consistent moisture during the “pegging” stage when the pods are forming underground. Do not overwater, as soggy soil leads to fungal diseases.
Have you ever opened a peanut shell only to find it completely empty inside? These are called “pops,” and they are caused by a calcium deficiency in the soil. To prevent this, apply garden gypsum directly over the plant rows right as the yellow flowers begin to bloom (usually mid-July).
Peanut Pests and Diseases
While generally hardy, peanut plants can fall victim to a few specific pests and fungal issues during the hot, humid summer months.
- Thrips: Tiny insects that feed on the emerging leaves, causing them to curl or look scarred. They rarely kill the plant but can stunt early growth.
- Leaf Spot Fungus: Around mid-July, you may notice small black or brown circular spots forming on the foliage. If left untreated, leaf spot will defoliate the plant, stunting the peanut development. Apply an organic dusting sulfur or copper fungicide every 10-14 days to keep the foliage healthy until harvest.
How to Harvest and Cure Peanuts
Peanuts typically require a long growing season of 130 to 150 days. You will know they are ready to harvest in the fall (usually October or November) when the foliage begins to turn yellow and die back. You must harvest them before the first heavy freeze.
- Digging: Do not try to pull the plant straight up, or you will snap the pegs and leave the peanuts buried in the dirt. Instead, take a garden fork or round-pointed spade, push it deep into the soil alongside the plant, and gently pry the entire taproot and root mass upward.
- Shake and Invert: Gently shake off the excess soil. Do not wash them! Turn the plants upside down (nuts facing the sun) and let them dry in the garden for a few days if the weather is clear.
- Curing: To prevent mold, peanuts must be properly cured. Move the pulled plants into a dry, well-ventilated garage, barn, or shed. Hang them for 2 to 3 weeks until the leaves are completely crumbly and the peanuts rattle inside their shells.
- Storage: Once fully cured, pull the peanuts off the stems. You can store them in mesh bags in a cool, dry place, or immediately roast them for a delicious homegrown snack!
Frequently Asked Questions
Do peanuts grow on trees?
No. Despite having “nut” in their name, peanuts are legumes. The plant grows as a small, leafy bush above ground, while the peanuts themselves develop entirely underground attached to the root system.
Can I plant peanuts from the grocery store?
Yes, but only if they are raw. You cannot plant roasted, boiled, or salted peanuts. You must use raw peanuts, and they must still have their thin red paper skin intact in order to germinate properly.
Why are my peanut shells empty?
Empty peanut shells, commonly referred to as “pops,” are the result of a calcium deficiency in the soil during the pod development stage. You can prevent this by applying garden gypsum to the soil when the plant begins to flower.